It is using a large percentage of the CPU while leaving less room for other apps to function properly. Users have reported that WMI Provider Host is using anywhere between 30 to 70% of CPU. As a result your processor will run at the maximum clock and it may result in overheating. Therefore, running the CPU at high usage levels for long periods can be damaging for the processor and consequently for other components around it due to excessive heat. You don’t have to worry as we have found ways to fix WMI Provider Host High CPU Usage problem using some proven methods. They are using in-built tools and services that Windows has provided for dealing with such scenarios. We will go through each solution one by one to rule out any possibilities and fix the high CPU usage problem.
What is WMI Provider Host(WmiPrvSE.exe)?
Windows Management Instrumentation (WMI) Provider Host (WmiPrvSE.exe) is a process that hosts the WMI providers.
What is WMI Provider Host(WmiPrvSE.exe)?How to Fix WMI Provider Host High CPU Usage1. Repair Corrupted System files2. Restart the WMI service3. Clean boot by disabling services4. Disable HP Software Framework Service (for HP Users)5. Fix problems using Elevated Command Prompt6. Perform a System Scan7. Restore Windows8. Clean Install Windows
It provides information about the state of the Windows system and data surrounding it to the software and scripts. This lets them run and behave in sync with the Windows system. Consider it as a bridge between Windows system and other applications/scripts running on the computer. The WmiPrvSE.exe process runs in the background and is essential for the smooth functioning of the operating system.
How to Fix WMI Provider Host High CPU Usage
1. Repair Corrupted System files
Your Window file can become corrupted or missing for reasons like power failure, hardware error, amongst other things. The mission files can result in instability and even throw out Blue Screen of Death (BSOD). We can use the System File checker tool in Command Prompt to find the gaps in the Windows system files directory and fix them. Here is how you can do it.
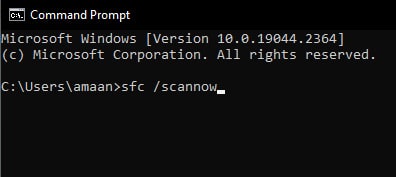
Launch the Command Prompt from the Start Menu search in administrator mode through the right-click menu. Alternatively, you can press Ctrl + R to launch the run prompt, then type CMD and then press Ctrl + Shift + Enter to launch it with administrator privileges.
Type the following command and press ENTER.
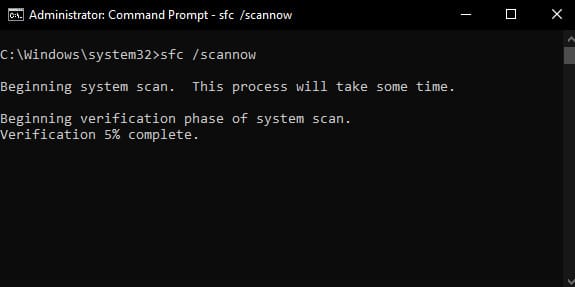
The System File Checker tool will start scanning for missing files. It will take a couple of minutes to finish.
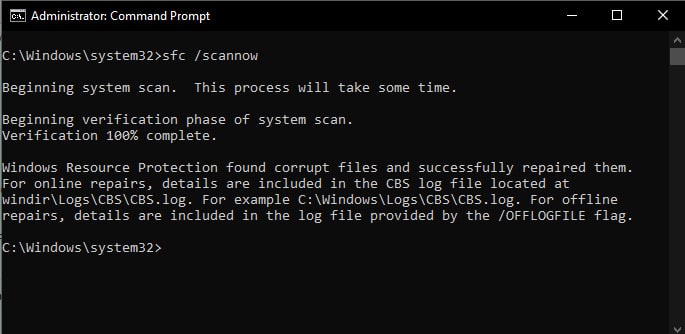
We got the Windows Resource Protection found corrupt files and successfully repaired them message. This means that some files were found corrupt and have been repaired by Windows.
However on the other hand if you come across some other messages after the scan, they can mean a lot of things. Here are the most common messages after SFC scan and what they mean:
Windows Resource Protection did not find any integrity violations – No missing files or corruptions were found during the scan. This means that Windows files are intact and functioning properly. Windows Resource Protection found corrupt files but was unable to fix some of them– This message appears when the SFC tool finds the corrupt files but fails to fix them. Your best bet here would be to boot Windows in safe mode and then run the tool with basic softwares running. Windows Resource Protection found corrupt files and successfully repaired them – We got this message as the system found some corruption in files and repaired them successfully. Windows Resource Protection could not perform the requested operation – The SFC tool failed to run due to conflict with a system component. You will need to run /chkdsk and then try with safe mode.
2. Restart the WMI service
Did you try turning it off and then on again? That is exactly we do with the WMI Provider to see if it solves the problem of high CPU usage. Here is how it is done.
Press Alt + R on the keyboard to open the run prompt
Type services.msc in the box and press ENTER to open the services dashboard.
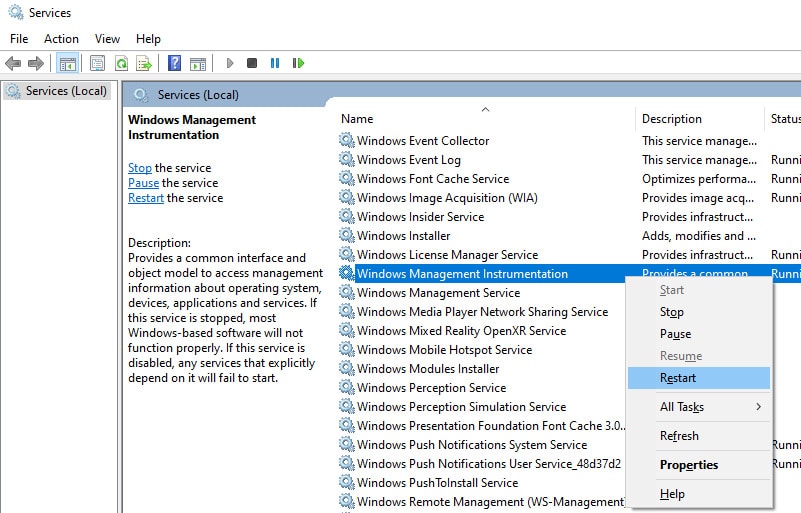
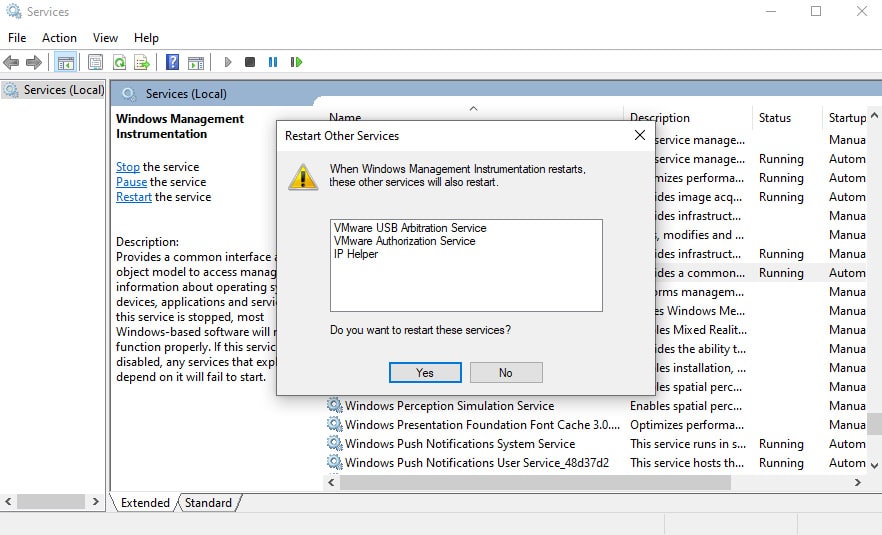
Scroll down and find Windows Management Instrumentation.
Right-click on Windows Management Instrumentation and select Restart from the menu.
You may get this prompt for confirmation. Click Yes and move forward with the restart.
The services dashboard will restart WMI services and other related services. You can see it happening in real time. Go to your Task Manager and see if the problem of high CPU by WMI Provier host is fixed. If the issue still persists then let us move to the next solution.
3. Clean boot by disabling services
Any non-Windows or third-party application running in the background can very well cause the WMI Provider high CPU usage. We can disable non-essential services from running in the background and perform a clean Windows boot. This way we will find if any of the applications are causing the problem.
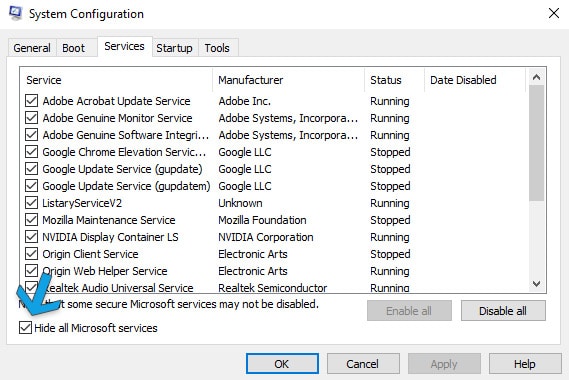
Open the run prompt, type msconfig and press ENTER. Alternative way is to search System Information in the Start menu search.
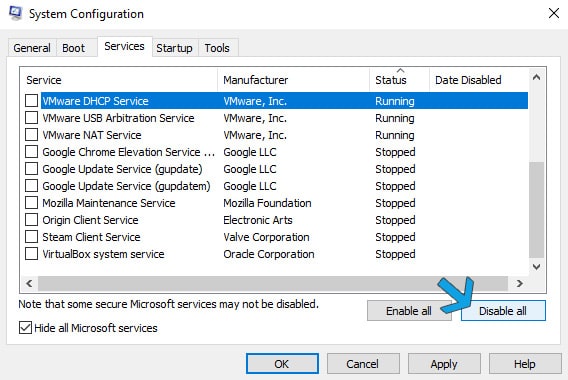
Head to services tab in the System Configuration and tick the box that says Hide all Microsoft services.
Click Disable All to stop all the background services and boot Windows with only the essential services for the OS running.
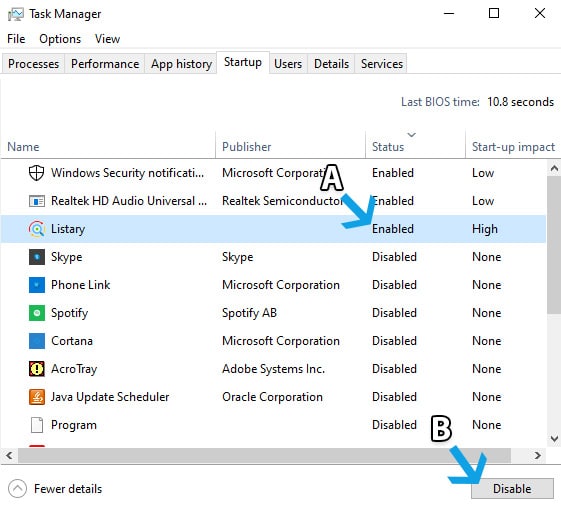
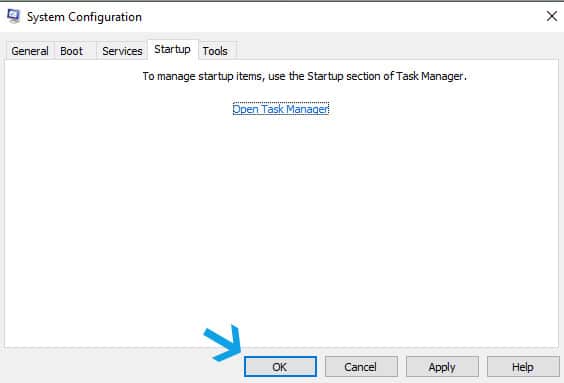
Now go to the Startup tab and click on Open Task Manager.
Select each process and disable it through the button. Do this for each of them and then close the task manager.
Head back to the System Configuration and click OK to save changes.
You will need to restart to apply the changes. Save your work and then restart later or you can do it instantly.
Check your CPU usage after restarting the computer. If the WMI Provider host has stopped using CPU then one of the application was the culprit. You can enable one service at a time and restart to find the problematic application. It will be a time consuming yet a permanent solution to your problem. In others cases if this did not fix the high CPU usage problem then we move to the next solution.
4. Disable HP Software Framework Service (for HP Users)
If you are an HP user then this might be reason for WMI Provider Host High CPU Usage on your computer. Skip this solution if you are not using HP laptop, desktop or a motherboard. Disable HP Software Framework Service to reduce CPU usage and here how it is done.
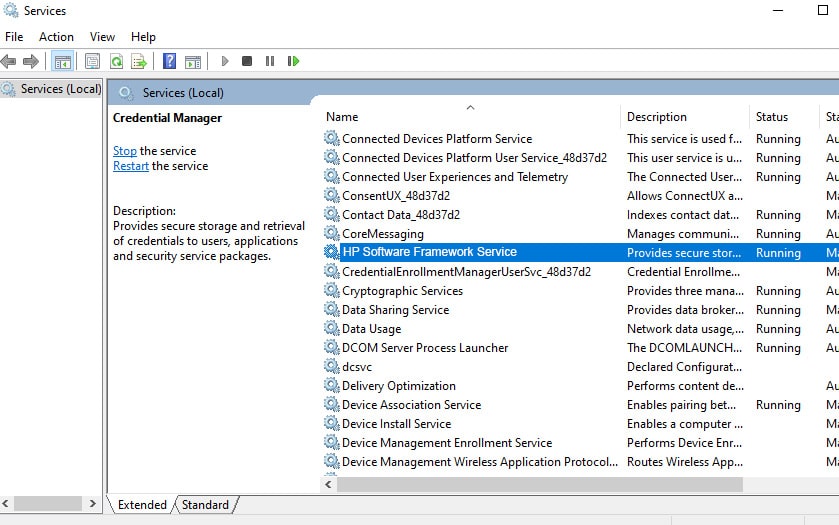
Open Services menu through the run prompt. Alternatively, you can search for services in the Start Menu for the same.
Find HP Software Framework Service from the list of services.
Right-click on HP Software Framework Service and head to the properties.
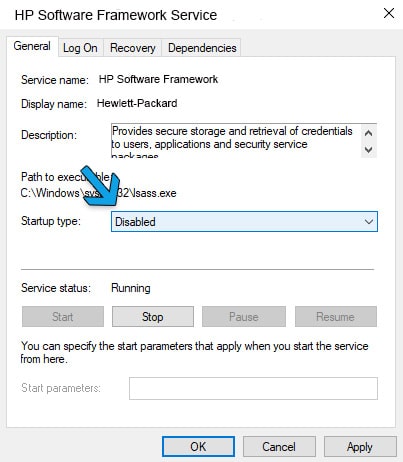
Change Startup Type to Disabled from the menu.
Save the changes by clicking OK button. This should fix WMI Provider Host High CPU Usage problem. You can also uninstall or disable HP Wireless uitilties and see if it helps.
5. Fix problems using Elevated Command Prompt
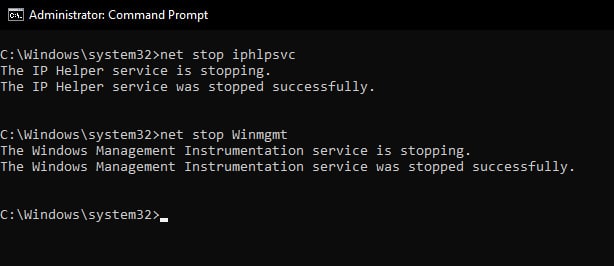
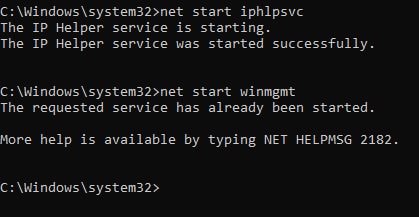
Some other associated Windows services can be behind the high CPU usage by WMI Provider. We can restart these services and see if it fixes the issue hand. Here is how it can be done.
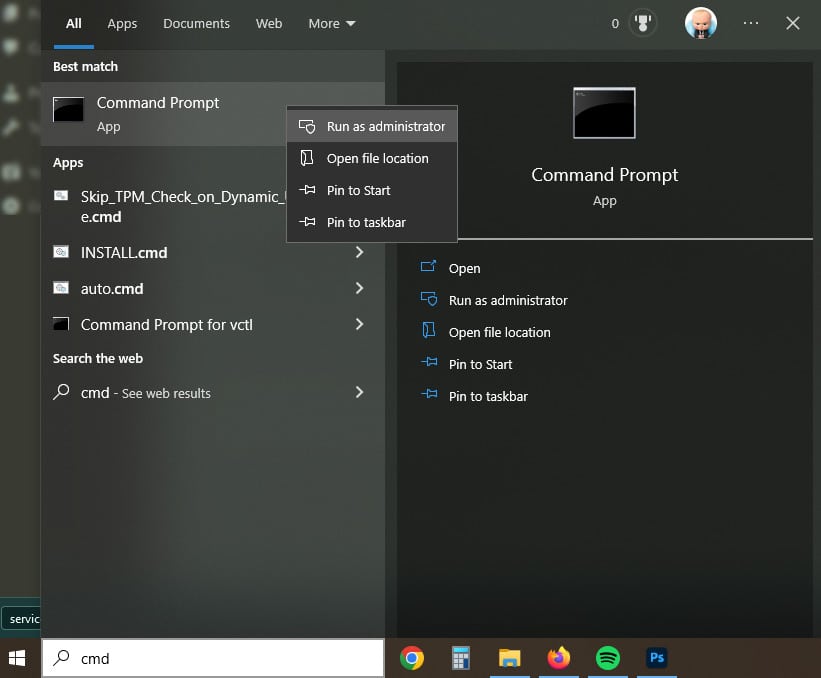
Open the command prompt with administrator rights
Enter these commands one by one, pressing ENTER each time.
Then type in these commands one by one, pressing ENTER each time. This will restart the services.
Head to Task Manager and see whether this fixed WMI Provider Host High CPU Usage issue or not. Let us move to the solution if this fails to address the high CPU usage problem.
6. Perform a System Scan
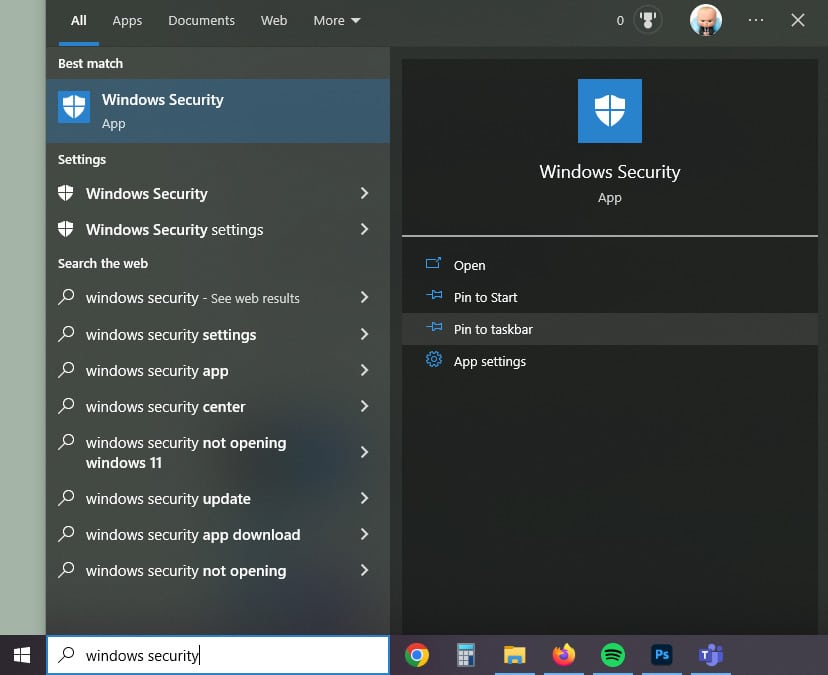
A virus can be a possible cause of a WMI Provider Host High CPU Usage issue. You don’t need an antivirus as Windows 10 ships with a robust computer security cover known as Windows Security. Here is how you can perform a virus scan on Windows 10 using Windows Security.
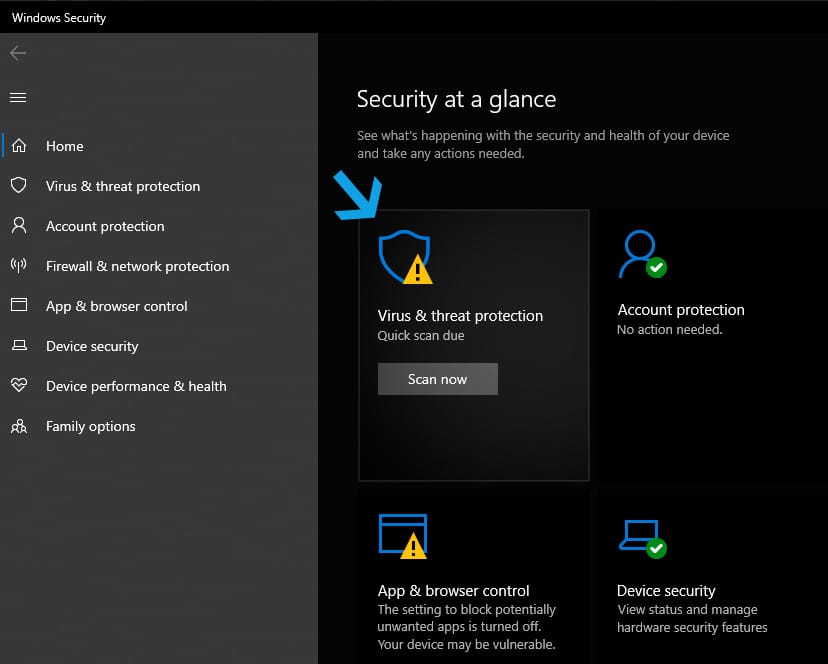
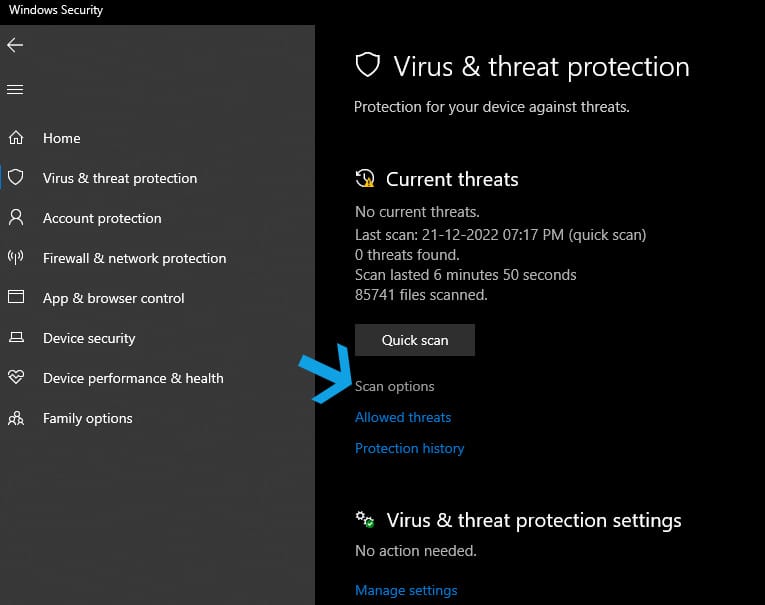
Click on Scan now for going to the Virus & threat protection menu
Go to scan options to perform an extension virus scan of the computer.
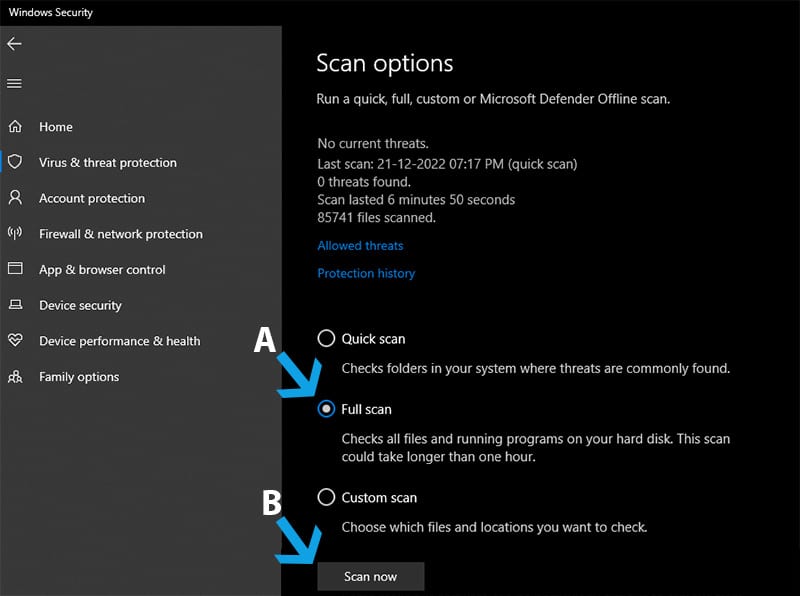
Select Full Scan and click Scan Now to begin the anti-virus scanning. It will take anywhere between 10 to 45 minutes, depending on the number of files and folders on your computer.
You will be asked to take action if threats are found during the scan. Take suggestion actions and then restart the computer. Then open the Task Manager to check the high CPU usage of the WMI Provider problem. If the issue is still there then move to the next solution in line.
7. Restore Windows
Ever since the WMI Provider Host High CPU Usage Problem started happening, a part of you would have wished for a time machine. The one that takes you back in time to when Windows was functioning without a problem. While it is too early for that technology, the System Restore feature on Windows comes a close second. It created a restore point of an earlier period in time when the computer was working without any issues. Unfortunately it is not enabled by default in Windows 10 and later. However if an IT guy set your computer during the initial setup, there is a chance that they might have enabled it. Here is how you can restore Windows to an earlier point and fix the WMI Provider Host High CPU Usage issue.
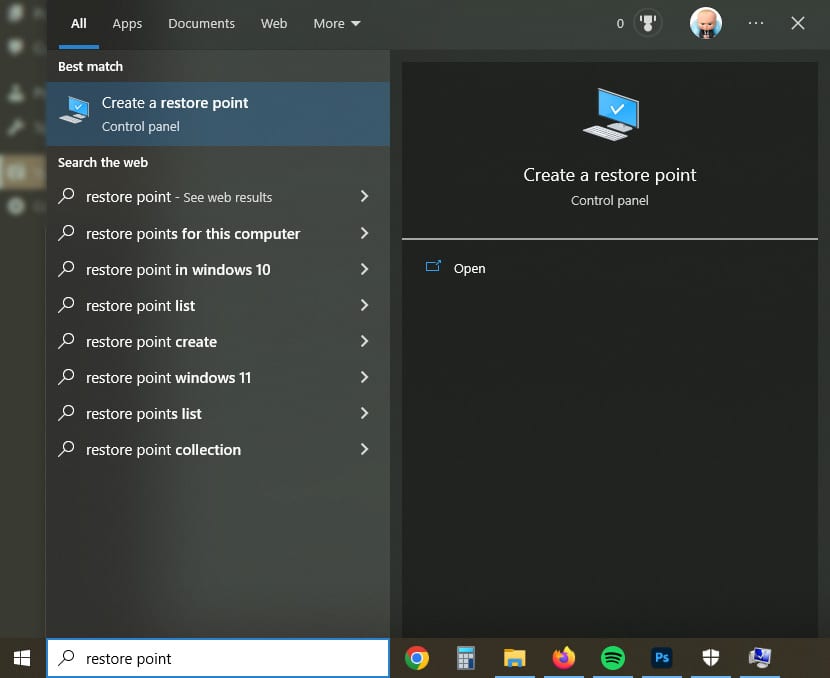
Search restore point in the Start menu search bar and go to the first result.
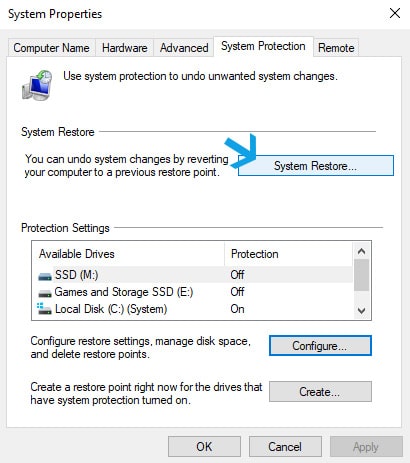
Go to the System Restore option in the System Properties menu.
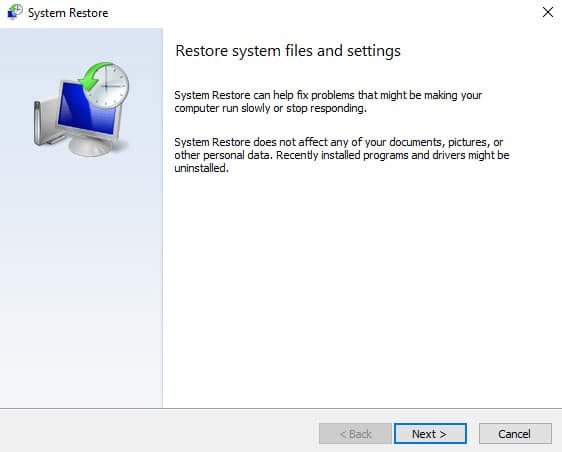
Click Next on the welcome screen of System Restore.
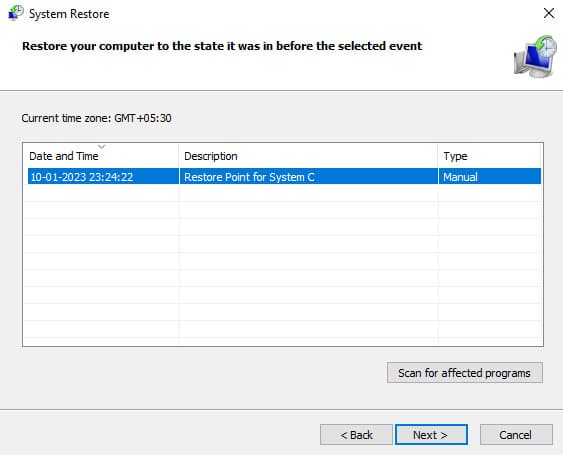
Select a restore point from the list and then click Next.Note – This list will only appear if a restore point is created early with System Protection enabled.
The system restore will take anywhere between 10-15 minutes, depending upon your storage speed. This should fix the WMI Provider Host High CPU Usage issue. But the problem existed when the restore point was created then it is likely that you will find it here as well. Consider going to the last solution to the last solution for this problem.
8. Clean Install Windows
Some software or drive is causing the high CPU usage problem with WMI provider but you can’t point even after trying everything we discussed above. Consider installing Windows as a last restore on the software level. This will help you start with a clean slate minus the unstable programs/drivers that were causing the issue. Backup your data in one partition and consider installing Windows through the method given here.
Download and Install Windows 11 Download and Install Windows 10
Over to You This is how you can fix Fix WMI Provider Host High CPU Usage by trying the most reliable solutions available. This error is on a software level so it should be resolved by trying out the methods we discussed in the article. You can also reinstall Windows to start fresh and get rid of the WMI Provider high CPU problem.